Welcome to our guide to bringing Starlink internet into a fifth wheel. In this first part we need to prepare the cable to enter the RV and plug into the router. I have to admit that cutting a perfectly good Starlink cable with proprietary ends was not something I was keen to do, especially without a backup cable in hand. The risk was mitigated somewhat by a shipment notification for my backup cable and the presence of my T-Mobile Home Internet, which is performing quite well here. This isn’t a difficult step, but it can be nerve wracking if you haven’t done it before. Keep reading for the guide.
Materials List
- Included Starlink cable and nerves of steel
- Pass Through Crimp Tool
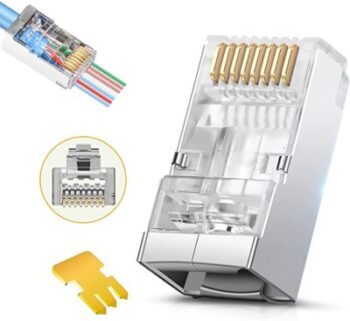
- Shielded RJ45 connectors


Cutting the Starlink Cable and Terminating the Ends
- Choose where to cut.
This is best done from the router end of the cable. Figure out where the Starlink cable will enter your RV and where you plan to place the router. Add a couple of feet in case you need a couple of attempts to terminate the cable successfully or you decide to place the router in a different place. Mark the cable where you are going to cut.
- Cut the Starlink cable.
If you don’t have a backup cable in hand, you might want to have a stiff drink before cutting the cable. Now you’re committed. 🙂
- Starting with the end of the Starlink cable that connects to the router, remove the insulation.
Use the score portion of the tool to score all of the way around the cable 2 inches from the end of the cable. Don’t press too deeply as you don’t want to accidentally cut the wires underneath or damage the shielding (the foil material just inside the insulation). Slowly slide the insulation off of the cable.
- Gently unwrap the shielding.
Don’t tear it off. We’re going to use it in a second.
- Untwist the wires.
Gently untwist the bundle of wires and then untwist each pair. you should have 8 insulated wires and a copper ground wire.
- Deal with the ground wire.
Fold the shielding backwards along the insulated portion of the cable. At this point you can trim it to about 3/4″ long. Take the copper ground wire and wrap it 2-3 times around the cable and over the folded back shielding. Keep it close enough to the end of the cable that the shielded RJ45 connector will close over it. This will be roughly 3/8″ from the point at which the shielding is turned back on the ends I linked above.
- Arrange the wires in the proper order.
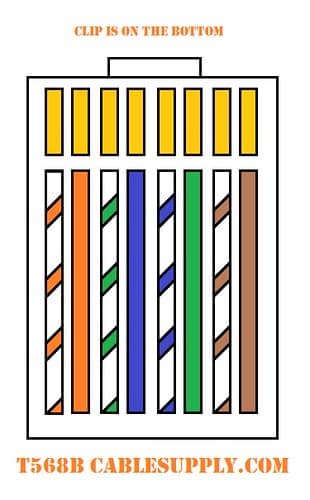
Line up the wires in the order shown below. This will make it a lot easier to deal with in the pass through connectors.

- Thread wires through the RJ45 pass through connector.
Thread all 8 wires one by one through the pass through connector, double check the order is correct, and then insert the wire and connector into the crimp tool. Crimp firmly. All 8 gold contacts should now be equally down.
- Repeat for the other (Dishy) end of the Starlink cable with one caveat.
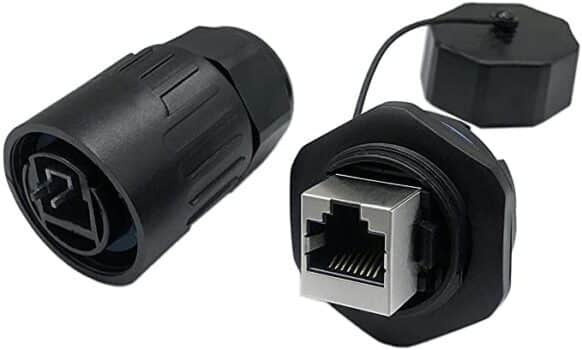
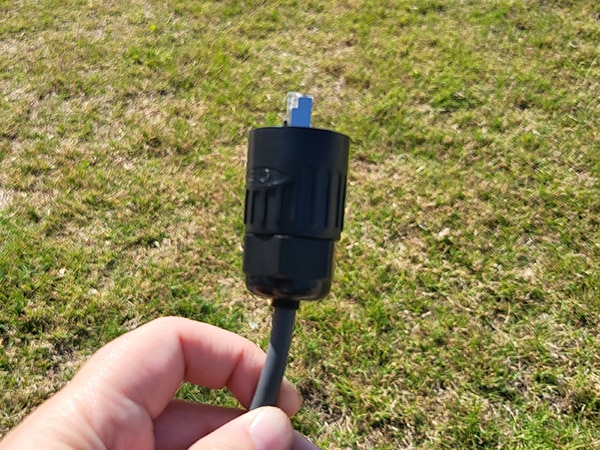
With that end of the cable completed, if you’re using the RJ45 panel mount coupler, you will need to thread the portion of the coupler pictured below onto the cable BEFORE you add the connector. I would do it before scoring the insulation in step 3 just to make it easier.

- Test the cable.
With the RJ45 panel mount coupler we’ll need for the next step in hand, plug in your newly terminated cables to the coupler and wait to see how Starlink responds. Sometimes it takes a couple of tries to terminate a cable successfully, so don’t despair. We had to terminate the outdoor portion a second time because we forgot to thread the waterproof boot from the coupler onto the cable before beginning the process. Oops!
The first step of bringing Starlink into your fifth wheel is done! It wasn’t all that bad, was it? Now, if you’re ready to get Starlink internet into your rig, head on over to part 2 to mount the RJ45 panel mount coupler in the pin box and then part 3 to mount the Starlink dish to the front of your fifth wheel.