We had a few weeks and a few moves’ worth of threading the cable into our fifth wheel, and frankly that was more than enough. I was always worried about the proprietary ends of the Starlink becoming damaged because of their notorious fragility, and I didn’t want to risk deforming the seals around the windows or slides as water damage is deadly to an RV. After exploring our fifth wheel and looking for potential entry points, my husband decided to go up through the void in the pin box and into the master closet. Keep reading for the DIY guide. I’m really happy with how it turned out. (If you’re looking to start from the beginning, you’ll find instructions for cutting and terminating the cable in part 1, here.)
Material List
- Cat 6E Shielded RJ45 (Ethernet) pass through connectors
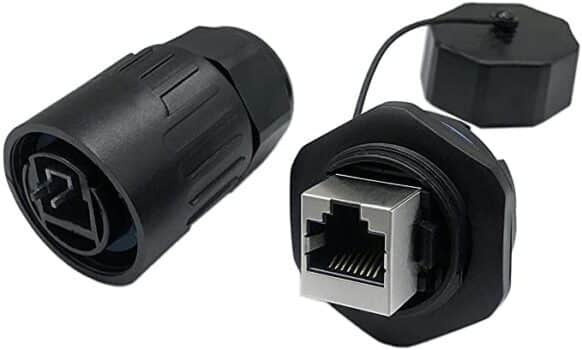
- RJ45 waterproof panel mount coupler. You will already have this if you started with part 1
- Butyl tape
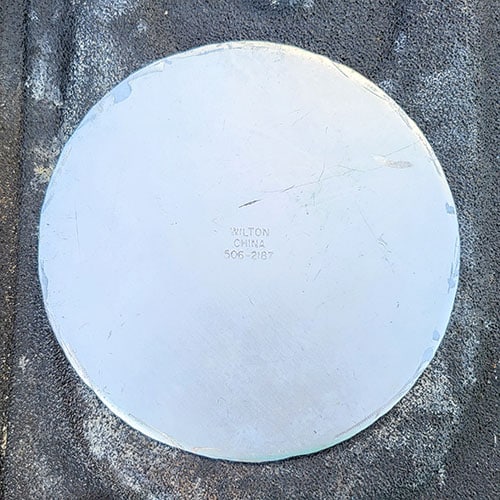
- Small piece of scrap sheet metal. We cut the sides off of a 6″ cake pan we had with a rotary tool and smoothed the edges. Unfortunately the final work takes the Wilton logo out, which is disappointing as I find this redneck engineering funny as all get out.
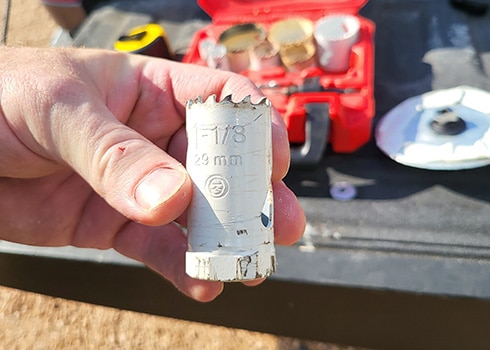
- Hole saw bit for drill in 1-1/8″ and 1 3/4″. Ours is Milwaukee brand and quite old, but this Dewalt kit will have what you need.
- Screws
Bringing Starlink Internet Inside Our Fifth Wheel
We considered several options. The first was the least invasive: we’d simply mount the router in the wet bay and bring the cable up through the hole that existed for the water hoses. The problem is that the Starlink router is weak and couldn’t provide a signal throughout our rig from there. Of course, there are those who are fine with coming in through a slide or window seal but over time you’re going to deform your most important defenses against water. Needless to say, that’s not an option we entertained.
The prior options being unacceptable led us look for a place to mount an RJ45 jack to breech the rig and place the Starlink router inside. At first we thought about bringing it up through the underbelly and into the space behind the dresser where wires are already routed and a hole already existed, but it was on the wrong side of the room from our network stuff. On top of that, our underbelly is usually quite full and I could see the cable or the jack getting damaged while we were digging through looking for something. We spent a couple of weeks trying to think what we were going to do.
Installing the RJ45 Panel Mount Coupler Inside the Pin Box
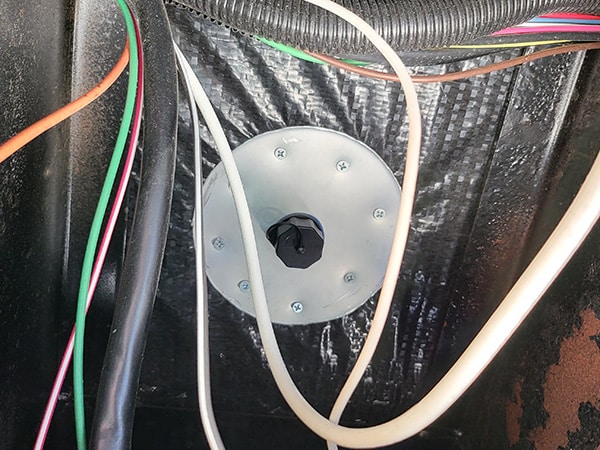
My husband came to the rescue with the idea to mount a waterproof RJ45 panel mount coupler inside the pin box and come up into our closet. It’s brilliant but simple: The metal surround of the pin box is going to offer extra protection from wind and rain and be invisible and out of the way when not in use. With our rig, coming up through the void in the pin box means coming up nearly dead center of the master closet. It’s a little unfortunate, but I decided to make it work since much of our network equipment is already nearby.Keep reading for the step-by-step guide, but here’s a sneak peak of the final install:
Step by Step Guide
- Prepare the sheet metal.
We used a 6″ cake pan that we cut the sides off of with a rotary tool and found it to be a manageable size. We also smoothed the edges with the rotary tool to minimize the chances of cutting ourselves or a wire in the pin box. Whether you scavenged an already-present piece of metal or picked something up at the hardware store, cut and smooth the metal to the appropriate size.

- Cut the hole for the panel mount.
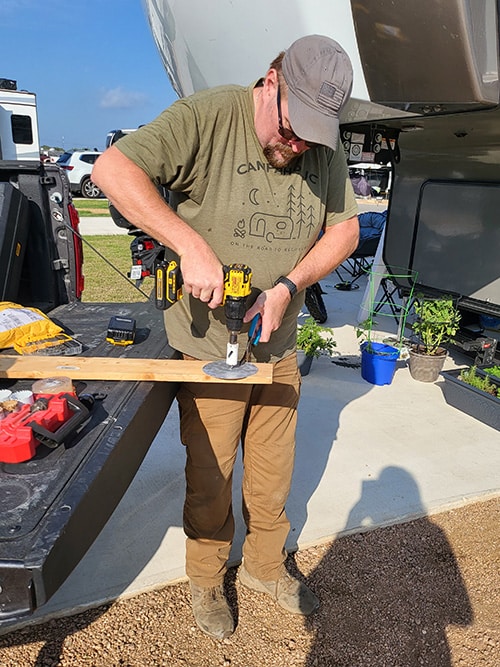
We used the 1-1/8″ hole saw clamped to a 2×4 in the back of my husband’s truck to cut a hole in this metal plate so that we can fit the waterproof RJ45 coupler to the plate.
- Assemble the RJ45 coupler to the metal plate.
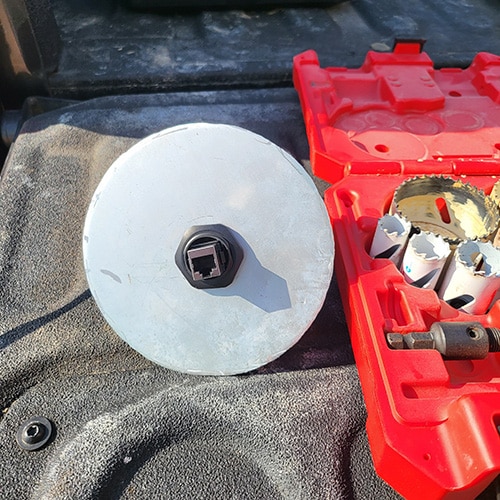
Confirm with Dean. Unscrew the back with the blue trim from the coupler, pass the coupler through the hole, and screw the back back into place. At this point, the side which will be exposed to the elements is the one with the waterproof cap. The unprotected side will be inside your rig.
- Time to drill a hole inside your pin box.
(Our Jayco North Point 377RLBH has nothing of note in this location to worry about like plumbing or wiring. I would recommend inquiring with owner’s groups or your RV manufacturer if you’re unsure if this location will work for your fifth wheel. If all else fails, you can always peel back some of the material surrounding the pin box and take a peek. )
Don’t forget to move items inside the fifth wheel in the general area you’ll be drilling into before beginning. Start with a small pilot hole with a drill bit. Thread a small wire or wire coat hanger through and see where it comes out inside of the rig. If the placement works for you, go back outside, pull the wire, and drill the hole with the 1-3/4″ hole saw.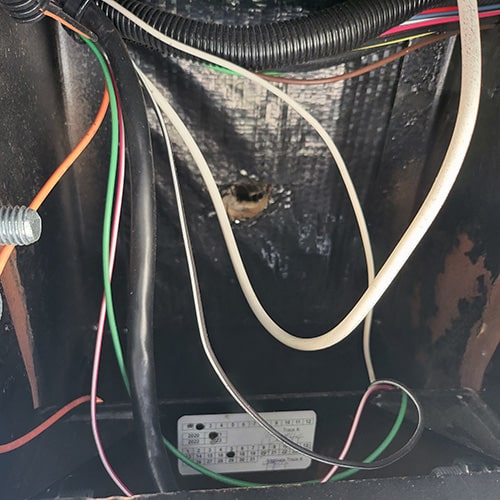
- Prep the plate with butyl tape.
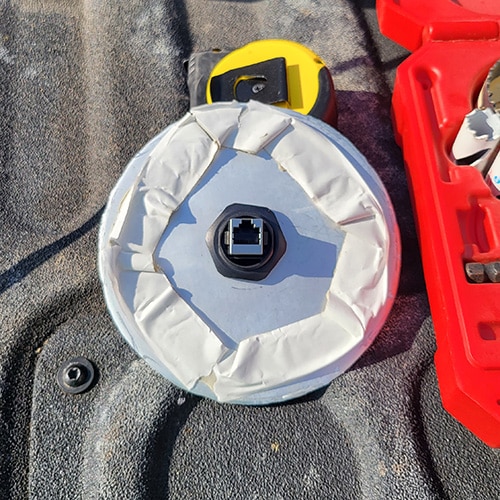
This will seal the plate and therefore the hole in your RV. Place the butyl tape around the edges of the plate on the side that will directly contact your fifth wheel about where you will place the screws to hold it in place. Driving the screws through the butyl tape and into the RV will result in a better seal.
-
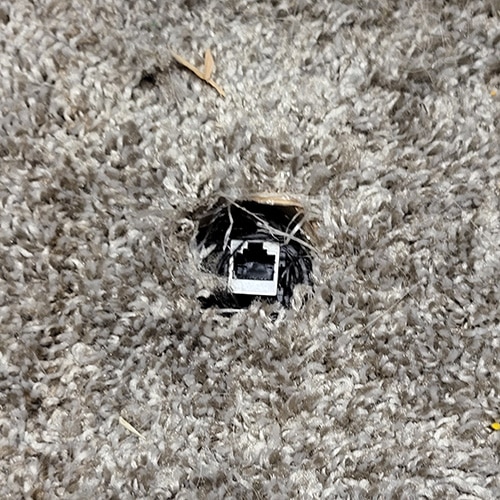
Peel the butyl tape and press firmly into place. Go inside the fifth wheel and check that the jack is accessible. We had to trim the rough edges of the carpet to allow the jack to function properly. Unfortunately I took the pic below before the trimming took place.
- Secure the plate to the fifth wheel.
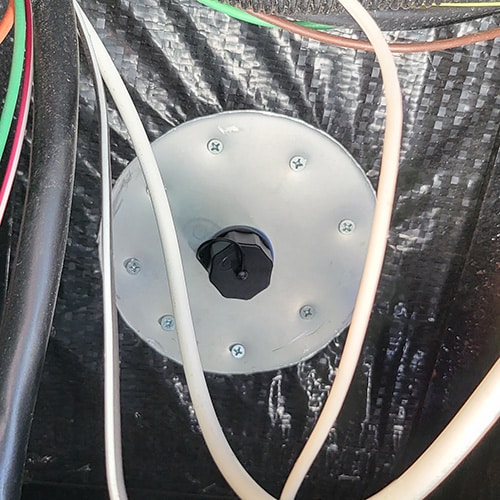
Once placement and functionality is verified and cleanly placed, go back outside and put enough screws through the plate and butyl tape to secure the plate to the fifth wheel. We put 8 screws around the circumference of our plate for a firm fit.
- Protect the cable going to your router.
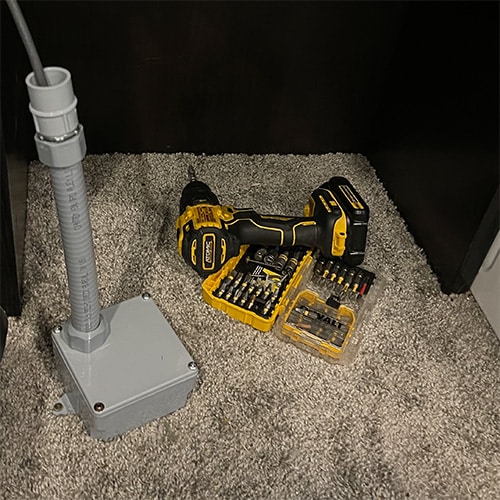
There are many ways to do this. The most important thing is that you do not want to crush the cable or force it beyond about a 40-degree curve. If coming through the pin box lands the cable in your closet you will need to take additional steps to secure the cable from getting snagged or crushed. We chose to simply use plastic electrical parts from the hardware store as an inexpensive option since it will not be seen. The tube that comes out is flexible and the cable is coaxed up the center divider of our closet by means of Command Strip cable clips like these. We will be remodeling our closet soon and didn’t want to invest in anything too permanent or expensive.
- Plug in and enjoy!
If you’re not moving on to part 3 where we mount the Starlink Dishy to the king pin, go ahead and plug things in and enjoy your internet.